Friday, December 16, 2011

Heavenly Popcorn

First of all, a BIG shout-out to all of my neighbors! Thanks for all the Christmas goodies! You might live in Utah if on a Monday night, before Christmas, your doorbell rings 5 or 6 times with families bringing you holiday goodies! Not kidding! Our first year in our home in Sun Prairie I took treats and cards to my neighbors. I got some funny looks. Apparently this was not a common custom back on Kelly St. Having said that, I was not planning on delivering treats this year, but... then I just couldn't resist. *smile* I hope this box is full enough!


Our Family loves this stuff, so Merry Christmas to you, here is the recipe!

Heavenly Popcorn

2 Bags Microwave Popcorn

1 12oz. bag White chocolate Chips

Pop corn, making sure to remove all un-popped kernels.

Melt Chocolate chips in microwave. Cook on high for 30 seconds and stir. Repeat 2 more times. (Be sure to use a dry metal or plastic spoon!)

Pour chocolate over popcorn and stir.

Lay out mixture on wax paper to set.

(Optional toppings: drizzle melted milk chocolate chips or crushed candy canes onto popcorn before it dries).

Thursday, November 17, 2011

Paper Projects

Just a few minutes down the road from me is a wonderland of fun... well a paper outlet any way. Or more specifically the S.E.I scrapbook outlet. (1717 South 450 West Logan, UT 84321). So FUN! I just can't say "no" to darling paper for 10cents a piece. Every time my sister Wendy is in town we seem to make a trip there. Here are a few projects we have been working on together.


Paper Flowers and Matching Cards
I used a template from Stampin' Up for the cards.
I found instructions for the flowers at
http://eighteen25.blogspot.com/2010/09/todays-guest-lil-luna.html
They made Halloween ones, but I though fall ones would be fun, and I could have them out on display for longer. I'm thinking Christmas ones would be darling too, or Spring ones for Easter... oh the possibilities.

They were so fun to make I decided to make more flowers to add to my collection.

Paper Monograms
I love this idea! I'm decorating "H's" for the different holidays and seasons to hang in our entry way. Fortunately H is reversible. This one is for fall, on the back I have made a Halloween one. More picts will be posted later when I've finished.

They are easy to make. I buy the letters at Hobby Lobby. The paper is obviously from. S.E.I. I simply use spray adhesive on the back of a piece of paper. I then carefully place it on the letter H. Next I take the metal file from Ryan's tool box to get all of the extra paper off. I can get a nice clean cut this way. To finish it up I add embellishments, hot-glue on a ribbon, and call it good.

Paper Pumpkins
So fun, So inexpensive, and So CUTE!
Wendy and I saw these at S.E.I and simply had to make some. Using a variety of papers we trimmed them down into thin strips of varying sizes. We then hot-glued them to the top and bottom of fake pumpkins. BUT THEN... with the help of Wendy's hubby Chris we figured out how to make them without a fake pumpkin underneath!


We simply cut out two, 2" circles and placed a bamboo skewer through them, leaving 3 or 4 inches between the two circles. We also left some skewer on top to use for the stem. Once the circles were secured with hot-glue, we were able to glue the papers to them to form the pumpkin.

This one has a pumpkin underneath.


This one does not.
To cover the skewer on top we just wrapped paper around it and added curling strips of paper for vines.
You can have a lot of inexpensive fun with paper! I can't wait to get going on my Christmas projects!

Wednesday, November 16, 2011

Postage Stamp Quilt

Every year my Grandparents send a little money to buy books for the boys for Christmas. I LOVE shopping for their books, and it is something I look forward to each December. She also sends a little gift money for me, but without instructions on how to use it. Last Christmas I had a GREAT idea. I went on line and bought myself this jelly roll of moda fabric and had it sent to my parent's house for Christmas. On the order their was a place to leave a message for the receiver. I had myself a little fun and wrote myself a note something like this:
"Dear Karin, You are such a great grand-daughter. We love you so much! Keep Sewing! Merry Christmas. Love, Grandma and Grandpa Andersen. " Hee Hee!
When my mom got the package and saw the note and what I had done she transferred the message to a real card and wrapped up the gift and set it under the tree. Christmas morning I got to open my gift and ooohh, aaaww at all the pretty fabric. I had already found the pattern I wanted to do: the Postage Stamp Quilt on modabakeshop.blogspot.com, and it made for one fun Christmas morning.

Sooo, I finally started my quilt in October. (It's been a busy year!)

It was fun to unroll the fabric and start pairing colors together.

I had the top pieced in a couple of days. It took me a few weeks to get back to quilting it. Once I did it didn't take too long from there. It then took one day to machine quilt, and two days for the hand binding.

And the end result: AWESOME if I say so myself!

I decided to use a "double bubble" pattern for the quilting. It was pretty easy to maneuver the fabric with my darning foot to get the effect.

Undecided on if I like the front or back the best.

Such happy colors! The fabric collection is called "Fresh Cotton" by Moda.


It's perfect for snuggling too!
Posted by Picasa

Saturday, October 8, 2011

Festive Fun for the Fall

Yeah! It's Autumn! I've already made my first apple crisp and corn chowder. I've also been busy with some fun fall projects. Last weekend my mom and two younger sisters were in town, so we set up shop in the basement and went to town.

So... this first project is from last year, but somehow it didn't make the blog. This is our Hochstrasser Halloween Countdown! Each box is filled with... CANDY of course! I used a canvas as the backboard and painted it green and sprayed glitter on it. I did all the decorating with a Halloween themed scrapbook pack I got from my Grandparents. I believe the S.E.I outlet in Providence has a good deal on fall paper right now. The boxes are those clear wedding favor boxes you can buy at Michael's. Using my staple gun I attached the ribbon to the top, and now it is hanging ready to be opened.

I had to reattach some of the boxes this year after the move... nothing my glue gun can't handle though!

Okay... so I had some left over Halloween Paper and I saw this idea on the Super Saturday's With On The Avenue blog I follow. And sure, I already have a Halloween Countdown, but I just loved the idea too much to pass it up.

I couldn't decide if I wanted to count down or up, so the base block is reversible so I can do it different each year if I want to. Thanks to my Super Smart sister Wendy the blocks can count down from 31, not just from 20. Tricky stuff.

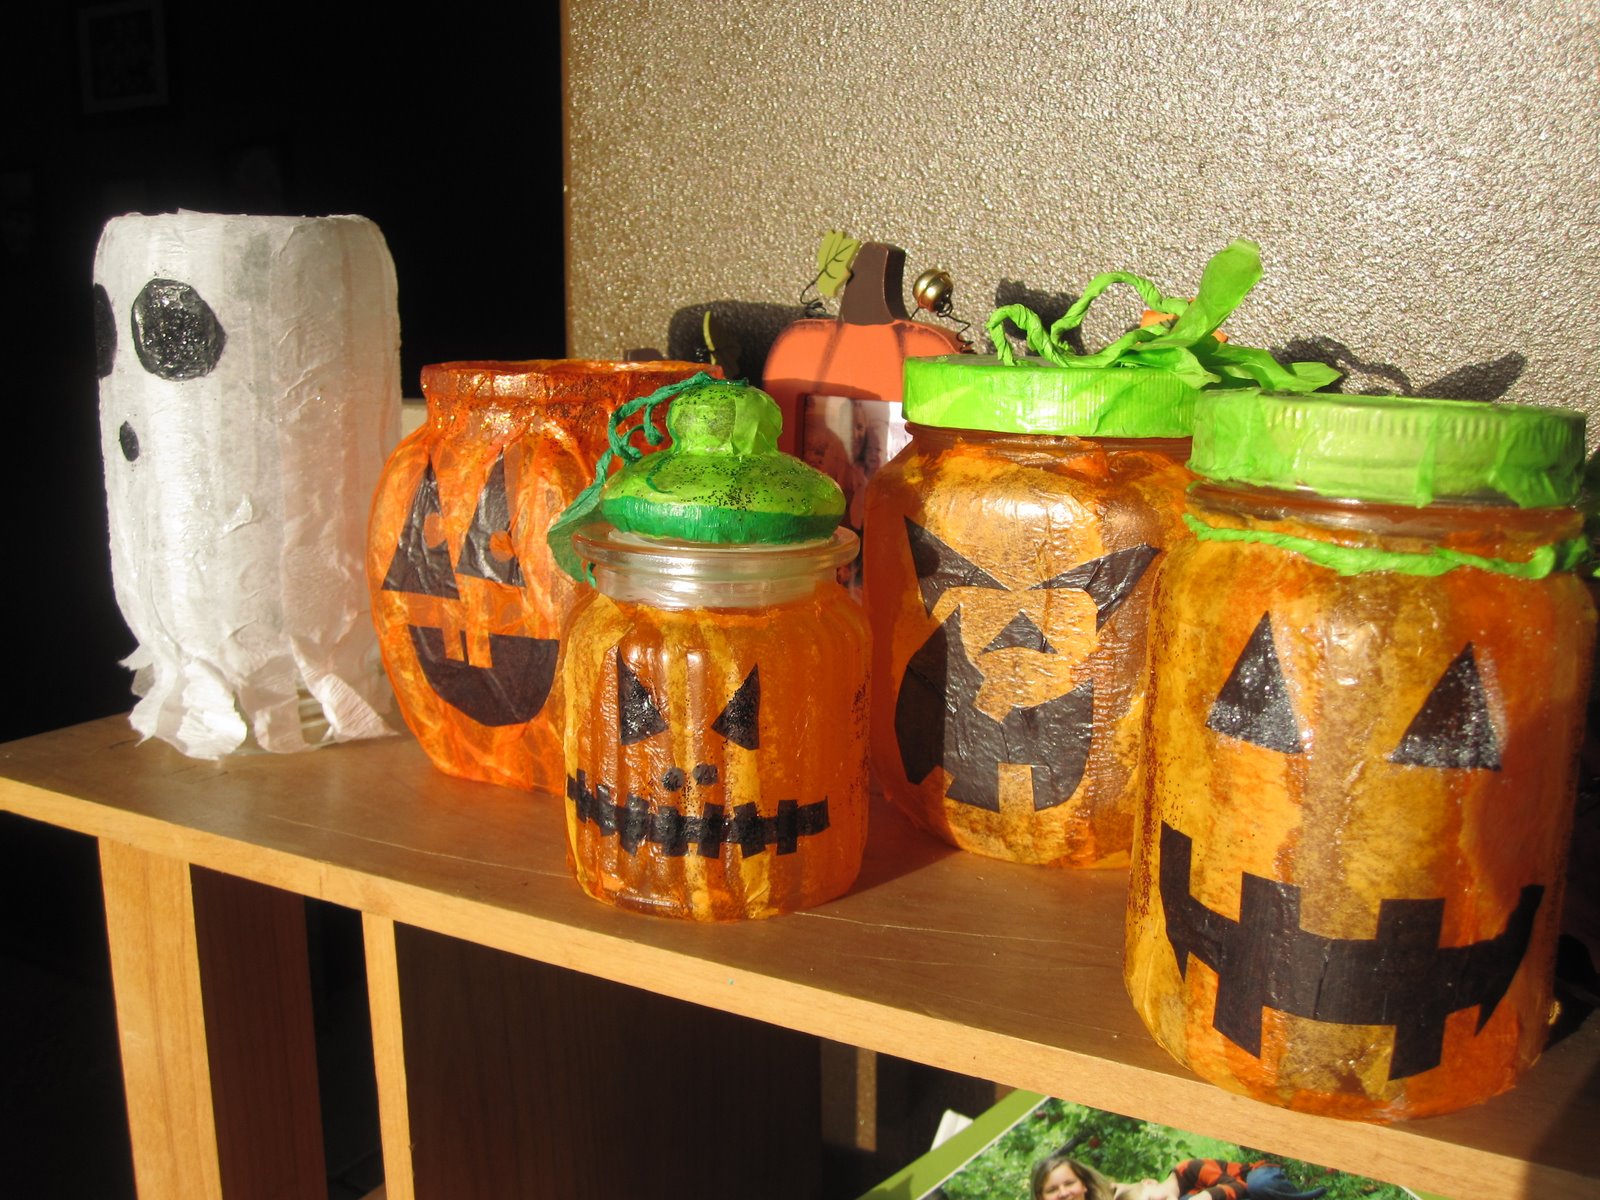
My mom came up with this idea and had us put it on the list of things to do last weekend. These beauties are made from glass jars, tissue paper and mod podge. Oh yeah, and a little glitter too!

Any size jar will do, and if you don't have tissue paper we found that crepe paper will work just as well. These would be darling with an LED candle inside them too.

My door is no longer naked! Yeah! I have officially made my first wreath. I went to Hobby Lobby and bought a little of this and a little of that. At home I trimmed, and fussed and weaseled everything into just the right place.

I even added a monarch butterfly.

Here is another idea from Mom and Wendy. They showed up at my house with lovely white pumpkins.

We got out our tissue paper, mod podge and glitter again and got crafty.

I was surprised at how different each of ours turned out.

We had a great weekend together, and we sure missed you Melissa! It was hard taking a sisters picture without you.
Posted by Picasa

Monday, September 12, 2011

Hospital Survival Kit

Today my Grandpa went in for a difficult surgery. The surgery went well, but he is in for a long recovery. My Grandma and Grandpa are my heroes and I look up to them so much. I don't like to think of Grandpa in a hospital. Hospitals are just not very fun places, so with the help of my boys we put together a Hospital Survival Kit for him with "hand-made" flowers and all!

To "tie" everything together I decided to go with a color scheme. To keep it simple I just went with GREEN. I don't think the world could have too much green satin ribbon. It just makes me happy! (and happy is good when you are in the hospital!)

The tag on these slippers says "Happy Feet = Happy Heart". So true...

"Shower Power" As much fun as the hospital generic soap is, I thought a little pampering was in order with this sponge, soap and shampoo pack.

"Game Time!" I had no idea there were so many different ways to play "word finds"! This really could provide hours of entertainment!

Here is a prescription worth taking! Lemon Drops! Grandpa has always had a stash of lemon drops in his office so I thought they would be a great little treat to include! Real Happy Pills!

Staying Hydrated is always important, and so is not mixing up your water bottle with someone else's! I don't think that will be a problem for Grandpa with this water bottle personalized with vinyl letters.

I don't know that any of this will really make a difference or help Grandpa recover better. I hope it does. It makes me feel better though, because I know he knows I care.
Love you Grandpa!

Tuesday, August 16, 2011

Summer Quilt

IT'S DONE!! Today, with sore fingers from binding, I finished my summer quilt! I started this quilt back in April shortly after we moved here to Logan and today I completed it! Woot! Woot!

This quilt is made up of 12 squares. It's not large, but the largest quilt that I have ever attempted to quilt on my little Maytag sewing machine. It was a little more work maneuvering all the fabric around, but totally worth the effort!

I haven't decided just what I'm going to do with this quilt. I knew going into it that I was making it for me. I'm so delighted with how it turned out that it seems like I should just hang it on the wall... but I really want to use it. I think that perhaps after all the kids are in bed it will be my t.v watching quilt... as long as I'm not eating ice cream at the same time...
There is just something wonderful about the wrinkly feeling of a quilt in your hands. It would be a shame to waste that and never use it.

Each square is a basic "Roman Square". I purchased the jelly roll of this fabric at Joann's while I was working on the quilt top for my mother's piano bench made with the same square pattern. One of my favorite things to do is make things for other people. That's part of the reason I have made this blog too...( since I give away lots of the things I make, now I have a place to document and remember them.) This quilt however, is just for me.

After searching on-line for different panto-gram patterns I found a flower one I liked. I doodled it out a few times on paper and in my head. Then I was ready to tackle the quilt. I know it's nuts, but I just free-handed the pattern of flowers and swirls right onto the quilt. It was a perfect fit for me and this quilt.

In the center of each lattice cross I placed a flower similar to the ones in each square. Then I just squiggled my way down through all the borders.

I'm so excited, can you tell?! It's done, and so are the dishes... Yes, I ignored the dishes for 24 hours just to get the binding done. But hey, that's the price of art and it is "sew" worth it!


Posted by Picasa